Thursday, May 31, 2012

Eat Your Spinach!


I was recently in Burlington, Vermont for my step-daughter Elinor's college graduation and made  a trip to the Burlington Farmers Market. It's a fabulous market with loads of vendors ranging from vegetables and proteins to plants, soap and objects d'art. I got a couple of bags of just-picked spinach and decided to write about it for you.


What is it about spinach? We all know it's good for us. Chock full of Iron, Calcium and Vitamins A & C. No fat, no cholesterol and the teeniest amount of carbs. Yet it draws the widest range of opinions from people from love to hate to indifference. Of course I would venture a guess that it's all about the preparation.
Spinach ranks up there as one of the most versatile ingredients to cook with: you can eat it raw in salads, sautéed or creamed as a side dish, or added to just about any kind of burger, to name just a few. This week I have a few easy ideas for you.


First up, I decided to make the ubiquitous Spinach Salad - but with my twist. After a quick 'fridge check I found a couple of things to mix things up: leftover roasted peppers, a little bacon and some hard boiled eggs. Add a little garlic, oil and some toast and you have a perfect lunch dish that won't weigh you down!


I saved some leftover grilled some bell peppers the night before, thinking I would used them in scrambled eggs for breakfast. (My husband Larry loves grilled peppers in just about any dish.) We both ended up skipping breakfast and moved right on to brunch, so my salad idea was born!

I took the grilled peppers and gave them a little boost with some additional olive oil and a crushed garlic clove. I also wanted to get them warmed up a bit. You're not looking to cook them anymore, just take the chill off from the 'fridge. After about 2 minutes I tossed in the spinach and let it wilt slightly. Here is an important note: the spinach was mature and had some body. Baby spinach in this case will completely wilt down and while still tasty, won't hold up in a pretty warm salad.


My finished product! I simply added a little leftover bacon crumbled up, a few are boiled eggs and tossed with a red wine vinaigrette.


For my second take on spinach I used it as a filling for some lovely Grey Sole filets I picked up a few days ago at my favorite go-to fishmonger Port Chester Seafood. This filling could not be simpler and you can use any fish filet of your choice, just look for one that can easily be rolled up.


I first sautéed a little shiitake mushroom and garlic.


After they got a little golden, about 5 minutes, I pushed them to the sides of the pan and added the spinach and seasoned with salt and pepper. You just want to wilt the spinach a bit here - it will continue to cook in the completed dish. I drained the the pan a little to remove the water that came out of the spinach, then tossed it all with the zest and juice of one lemon.

I did a simple seasoning of olive oil, salt and pepper to the filets and started rolling! Just for good measure I added a little chopped parsley and fresh breadcrumbs.


I placed my fish rolls over a medium hot grill and cooked for about 5 minutes. I can't believe I'm saying this - but I don't have a finished picture! I pulled them off the grill and we ate them right away. It was only after that I realized I forgot to snap a picture for you. The filet was moist and full of flavor from this wonderful filling.


I hope this encourages you to give this tasty vegetable a try. Spinach really is good, and so good for you too!


Buon Appetito!


Red Wine Vinaigrette
Makes 1 ½ cups

¼ cup red wine vinegar
¼ cup lemon juice
1 teaspoons salt
½ teaspoon freshly ground black pepper
1 cup olive oil

Place the vinegar, lemon juice, salt, and pepper in glass jar and shake to blend. Add olive oil and shake well until emulsified. Store in ‘fridge tightly sealed.


Spinach and Mushroom Fish Filet Rolls
Serves 4


4 thin fish filets, grey sole or flounder work well
3 oz shiitake mushrooms, sliced thin
1 garlic clove, chopped fine
4 cups mature spinach, roughly chopped
1 lemon, juiced and zested
1/3 cup fresh bread crumbs
1/3 cup chopped fresh parsley
Kosher salt
Fresh ground black pepper
Extra virgin olive oil


In a pan over medium heat add 2 tablespoons of olive oil, the mushrooms, garlic and ¼ teaspoon each of salt and pepper. Sauté for about 5 minutes until golden brown. Push the mushrooms to the sides of the pan and add the spinach with another pinch of salt and pepper. Turn off the heat and allow to cook for another 3-4 minutes tossing in the hot pan, until the spinach wilts slightly. Drain out the water and add the lemon zest and juice and toss well. Set aside to cool slightly.


Meanwhile, prepare your filets by seasoning with olive oil, salt and pepper on both sides. Sprinkle each with 1 tablespoon of chopped parsley. Divide the spinach-mushroom mixture between the 4 filets and top with 1 tablespoon of breadcrumbs over each. Roll and place seam side down on an oiled grill pan or cookie sheet. Top each with remaining breadcrumbs and parsley.


Grill over medium heat for about 5 -10 minutes, until filets are cooked through, but not dry. If cooking in oven, place in a preheated 375° oven for 5-10 minutes. (Check after 5 minutes to see if they are done.)


Serve immediately.

Thursday, May 24, 2012

Sweet Vidalia

Julia Child once said, "It's hard to imagine a civilization without onions." I could not agree more. What is it about them? They add so much flavor to everything we eat - and we use them in so many different ways: raw, grilled, pickled and of course added to our mirepoix to flavor the base of many dishes. It's a vegetable that dates back to the Bronze age. Egyptians buried it with their dead, Romans used it medicinally and the Europeans in the Middle Ages used them to barter. There are so many varieties with so many flavors.


Here is a little factoid about cutting an onion:  did you know that it releases a gas called  Propanethiol S-oxide? When mixed with certain enzymes in the onion, it creates a sulfur gas. These gases then get to your eyes and create a mild acid which irritates the eyes. So just about the only way to not cry is wear goggles.


Today I'm going to focus on the sweet variety. Within the sweets some  popular ones are: Walla Walla, from Washington and Maui, from Hawaii; but these pictured above are the famous Vidalia from Georgia. They are my favorite, possibly because they are the first sweet onions I ever tasted, and I love their flavor.

Their shape is unique, round and slightly flat and this year's crop are just appearing in the market now. Here is an interesting tidbit about how they are grown: they are started in seed beds in September and then hand planted in November, just in time to harvest now. As with other onions you want to purchase this vegetable when its nice and firm, without soft spots or green sprouts. Nutritionally they are fat free, cholesterol free, sodium free and a good source of Vitamin C. I thought it would be fun to try to use them two different ways this week. This beautiful bunch was picked up at my local grocery store a few days ago. They are just gorgeous - small and golden.

Earlier that morning I had picked up a couple of soft shell crabs from Port Chester Seafood and I also had a few portobello mushrooms in the 'fridge. Just to mix things up I decided to season everything with something other than a typical seafood crab spice. If you've never been to Penzey's you've got to check it out. Locally you can find them in the Palisades Mall and  Norwalk, CT.  You can find them on line too, but if you are close enough to a retail store you must make the trek. My friend Lynn introduced me to that mecca of spice several years ago and I've never looked back. In addition to having basic and exotic spices they make the most wonderful blended seasonings. I've frequently told participants in my cooking classes at Tarry Market that using blends can be one of the easiest ways to add a lot of flavor to your cooking without getting stressed about how many herbs and spices you are trying to add. For this simple sauté I used their Northwoods spice. Its a blend of several basic spices and includes chipotle. Herbacious with a kick!


I simply sliced the onions and seasoned them with olive oil and the Northwoods blend. I did the same for the mushrooms and crabs. In a grill pan on the stove top I cooked the onions and mushrooms together. Once they were done I tossed in the crab right into the same pan and finished them. A quick and tasty dinner in less than 30 minutes!


I had in my mind to do something that could be cooked down or pureed for my second recipe. Over the weekend we celebrated Elinor's graduation in Vermont and I headed up the cooking for a big family dinner. Grilled chicken seemed to be the most logical choice for the BBQ, so I created a little marinade that worked out beautifully. (The recipe is below.)


After grilling the onions over charcoal I blended them with a few ingredients for a lovely marinade. This recipe makes a lot, so what I ended up doing was dividing it and using the other half for my guests to drizzle over their cooked chicken, as desired.


I hope you give these zippy sweet onions a try this weekend. You simply can't go wrong, even if you just slice and grill them for your weekend BBQ.

Buon Appetito!


Maria’s Vidalia Onion Marinade
Makes about 4 cups

3 medium Vidalia onions, sliced 1½ ” thick
1 sprig of fresh rosemary, leaves only
1-2 tablespoons dark brown sugar
½ cup balsamic vinegar
1 cup extra virgin olive oil
½ cup water, plus more if needed
1 ½ teaspoons kosher salt, plus more
1 teaspoon coarse black pepper, plus more
Chicken of your choice, with skin if possible


Drizzle the onion slices with olive oil and season with salt and pepper. Grill over hot charcoal until nicely charred. Cool slightly and place in a blender.

Add the rosemary, vinegar, oil, 1 tablespoon of sugar, water, salt and pepper. Puree until smooth. Taste for seasoning and add a little more sugar if desired and water if it’s too thick.

Divide in half and cover your chicken, marinating for a few hours before cooking. Set the other half of the marinade aside for serving.

Cook your chicken as desired, but do try to get the skin crisped!


Saturday, May 19, 2012

Mellowing the Tartness of Rhubarb

Rhubarb ... it's one of those mysterious ingredients in the produce aisle. Not being a regular "baker" it doesn't call to me. My friend Lynn grows it and cooks with it a lot. Particularly making the ubiquitous Strawberry Rhubarb Pie that my step-daughter Elinor adores. So when I decided to highlight it this week, as it's in season, I wondered how I could make it savory? The bunch I brought home was picked up at the Chappaqua Farmers Market from Madura Farms.


The leaves are poisonous, and typically are removed by the time they get to the store. However, if you are harvesting yourself, be sure to throw them away! If the stalks are really thick you can remove the outside strings by peeling them with a small paring knife. The texture of the stalk is similar to celery, the flavor however, is a different story!

The flavor of rhubarb is distinct and remarkably tart. In desserts it's typically macerated with sugar and paired with strawberry to balance its bite. (We'll get to that in a minute.) So how do incorporate it another way?


After a quick perusal of my cabinet I came across some red lentils. Maybe a stew? One of my clients that I cook for has a child that was, up until recently, a vegetarian. So a few years ago when I started cooking for them I needed to make a lot of vegetarian dishes every week. I picked up Mark Bittman's tome on all things vegetable, and it has been my go-to reference for many, many ingredients. Happily to my surprise he has a Dal recipe using red lentils, with the suggestion of adding rhubarb! His recipe is below, but I can tell you now this could not be an easier dish to make. You basically put everything together in the pot, add water and let it all cook together to create a creamy spicy stew. Dals are typically found in Indian cuisine, made with lentils and served over rice.

I'm sure you're saying, "Come on Maria, where is the rhubarb dessert?" All right ... here is just about the simplest "crumble" dessert you can make. (The recipe is below.) I found these incredibly amazing strawberries at Tarry Market.


The white ones are called Pineberry and the red ones are Strasberry. Really beautiful and luscious. The pineberries taste like a cross between a pineapple and strawberry. The strasberries are  wild strawberries that resemble a raspberry. They don't taste like them, just a similar shape.


After macerating the rhubarb in some sugar, I added the strawberries and a little flour.


Place in ramikens and bake for 20 minutes. How easy is that?


I hope I've enticed you to purchase some rhubarb this weekend. It's relatively inexpensive, readily available and super easy to use.

Buon Appetito!


Red Lentil Dal with Rhubarb (recipe adapted from How to Cook Everything Vegetarian)
Serves 4

1 cup dry red lentils
1 tablespoon grated fresh ginger
2 cardamom pods
1 tablespoon yellow mustard seed
2 whole cloves
1 teaspoon coarse grated black pepper
1 small dried ancho chili
1 cup rhubarb, 1/4-inch dice
kosher salt to taste
2 tablespoons butter

Combine the first 8 ingredients in a small pot. Cover with cool water by 1 inch. Cook at a steady simmer for about 30-40 minutes, seasoning with salt as they cook. (Remember, add your salt slowly. You can always add, but you can't remove!)

After you get a nice thick consistency remove the cloves and cardamom and stir in the butter. I tossed in a little cilantro too. You can serve this over the rice of your choice warm or over a nice piece of crusty bread at room temp.


Strawberry Rhubarb Crumble
Serves 4

2 cups rhubarb, 1/4-inch dice
1/4 cup sugar
2 cups small strawberries, quartered
1 tablespoon flour
1/4 cup oats
1/4 cup flour
1/4 cup brown sugar
1 tablespoon butter

Preheat the oven to 375 degrees.

In a small bowl mix the rhubarb and sugar. While the rhubarb is macerating clean and quarter the strawberries. Add to the bowl along with the flour and mix well. Combine the rest of the ingredients working the butter into the mixture with your fingers.

Divide the fruit between 4 ramekins and top with the oat mixture. Place on a cookie sheet lined with parchment or foil. (The mixture is going to bubble over.) Bake for 20 minutes. Remove and cool slightly. Top with ice cream if desire.


Thursday, May 10, 2012

Fabulous Favas

Another sure sign of Spring: the beautiful fava bean appears. Long, non-descript pods piled high at the market or at your local specialty store. Favas are loaded with great nutritional value: they are a source of protein, folate, and many essential vitamins including B. Their flavor is nutty, ever so slightly bitter and oh so yummy. They can be eaten whole, mashed or pureed. In my research of favas I came to find out that this wonderful healthy ingredient dates back to the Bronze age, said to have been originally cultivated in the Mediterranean. (wow!)


When I picked these up at the market I wasn't sure exactly what I would be doing with them. Sometimes, well actually many times, I pick things up that look interesting. On my way home I usually start percolating ideas in my mind.


After placing the favas in my basket I also spotted these really pretty purple carrots too. Here is an interesting factoid: before the 17th century carrots were predominantly purple, in addition to also being yellow and white. In the late 16th century Dutch growers crossed several varieties and cultivated the orange color we see today.


First things first: you need to shell the beans. The pods are pretty easy to open and the beans easy to slide out.

Once you shell the beans you need to blanch them, not only to cook them but to also help get the actual bean out of it's thick casing. Since my beans were on the small side I blanched them in boiling salted water for about 3 minutes. After letting them cool a bit they popped right out.


My husband Larry came home from work just as I was finishing up with that last step. When I showed him what I was doing he responded, "Wow, seems like a lot of work." He's probably right. However, most things that are special take a little extra work, right? The way I see it, fresh favas only come around once a year, so go ahead and take the time - it will be worth it!


I like doing non-thinking prep tasks from time to time. You can let your mind wander, and in this case, I got to thinking about a great salad I had when I was in Greece a few years ago. The thing that was so interesting about it was the salad was sitting on top of a bread rusk. A bread rusk is basically a piece of bread that is twice baked, typically found in Crete.  In that particular dish the dressing and juices from the tomato soaked into the crunchy bread and softened it slightly. I just happened to have a small round Tuscan boule that would work perfectly. Using my favas and purple carrots I was going to re-imagine that salad!


After I finished with my favas I turned my attention to the carrots. After a quick peel I decided to just steam them for a few minutes. Once cooked I sliced the carrots and set them aside. The tops of my carrots were in really good shape, so I decided to use them in my dressing. I highly encourage you to do that as well. Carrot greens are edible and have great flavor. 

Now to pull it all together: along with some delicate baby spinach I tossed it all with a simple lemon vinaigrette and served over my crunchy slice of rustic bread. Just for good measure I topped with some toasted almonds.

Don't be discouraged by the time factor of favas. Like I said, they only come around once a year and you would be missing something special if you don't give them a try.

Before I sign off I want to take a moment to wish all the Mom's out there, especially mine, a very Happy Mothers Day this coming Sunday. If you are are looking for something fun to do this weekend you might want to check out my special cooking classes just for Mom and kids, at Tarry Market.

Buon Appetito!


Fava and Spinach Salad
Serves 4
1 bunch small purple carrots, peeled, tops reserved
1/2 cup fresh lemon juice
1/2 cup extra virgin olive oil
2 tablespoons of finely minced carrot greens, or parsley
Kosher salt and freshly grated black pepper to taste.
4 cups of baby spinach
4 thick slices of rustic bread, drizzled with a little olive oil and toasted
1/4 cup blanched almonds, toasted (optional)

2 1/2 lbs fresh fava beans, shelled, final yield is about 1 cup


Place two small pots of water on to boil and add a teaspoon of kosher salt to each. Add the shelled favas to one pot and the peeled carrots to the other. Blanch for 2-3 minutes. Drain both and set aside to cool.
Meanwhile combine the lemon juice, olive oil, carrot greens and seasoning, whisking until blended.  Set the dressing aside.


Once the favas are cool enough to handle gently remove them from their waxy casing. That can be done easily by pinching the end and letting them pop out. (This is probably the most time consuming part, but once you get into a groove it will happen quickly.) Add them to a large mixing bowl. Slice up the carrots and add them to the bowl along with the spinach. Toss with about a third of the dressing.


Place the bread slices on four plates. Drizzle each with 2 tablespoons of the dressing. Divide the salad evenly over the four plates. Top with the nuts, another drizzle of the remaining dressing and serve immediately!

Wednesday, May 2, 2012

Ramping it up with Ramps


Ramps: what on earth are they? Certainly not a mainstream ingredient, that's for sure.

My first introduction to ramps was in the kitchen of Tarry Lodge. One Spring day Andy Nusser returned from a morning of "foraging" with an armload of these delicate beauties, and after a good wash got to work creating with them. In my little corner of the Tarry Lodge world of antipasti they appeared in the faro dish and I was hooked.
Ramps are from the onion family. They are delicate and beautiful with broad, smooth, bright green leaves, often with deep purple or burgundy tints on the lower stems. They make their appearance in late Spring when the last of the snow melts. Their bulbs are a bit scallion-like rooted just beneath the surface of the soil. Ramps have a strong and distinctive onion scent and taste a little like garlic. They even are a source of Vitamins A and C. Since ramps can be eaten raw or cooked I thought it might be fun to use them two ways in this week's post.

Every now and then I like to make egg salad. I'm not a big fan of mayo - except maybe on a ham and cheese sandwich - so I like using Greek yogurt, and so does my husband. I use it frequently as a sub for mayo or even sour cream. After a quick check of the 'fridge I found several ingredients to add to my ramp-egg salad.


Let me take a minute to share a little tip for making perfect hard boiled eggs and it's simple! Place your eggs in a pot with cold water, covered about 2 inches. Bring to a boil.


Then take off the heat, cover the pot and let them sit for 12 minutes. Run them under cool water and peel.


While the eggs are cooking you can get your ingredients sliced and diced. Once you have it all done, give everything a gentle mix and serve on a soft bun with some delicate greens.
For my second version I decided to grill the ramps and make a nice pesto. I love grilling veggies - I pretty much do it all year round. Since it was raining the day I was creating this recipe I decided to grill right on the stove top. I got a really nice char on them which adds a smoky flavor. 


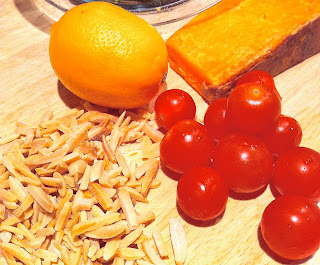
After a quick check of the 'fridge this time I had some spinach, a meyer lemon and a piece of Sparkenhoe cheese. Just to round out the flavors I toasted some blanched almonds I had handy.


I know these ingredients sound a bit "out there" but that is what I was going for. It's perfectly acceptable to go that typical route of pine nuts, basil and parmesan, but I did not want to mask the sublime flavor of the grilled ramps.


I needed some extra body and the spinach provided it, without competing with the flavor of the ramps. Just for good measure I sautéed the spinach right in the ramp pan.


After I got the pesto together I took a look at the tomatoes and decided to grill them as well. (Why not?)  I simply dropped them into the same pan that I used to cook the ramps and spinach with a little more oil and some salt and pepper. Not only were the gorgeous, but they provided the perfect acidic bite my finished dish needed. 


Perfetto!
If you've never tasted a ramp now is the time. They won't be around for much longer. Look for them this weekend at your local farmers markets. If you are out and about come and find me at the Chappaqua Farmers Market, this coming Saturday. I'll be there doing a cooking demo from 11:00-1:00.
Buon appetito! 


Egg Salad
Serves 2
4 eggs
1/4 cup breakfast radish, fine dice
2 ramps, white and green parts sliced thin
2 tablespoons Greek yogurt
1 teaspoon dijon mustard
1/2 teaspoon kosher salt
1/4 teaspoon ground black pepper
Place the eggs in a small pot and cover 2 inches above with cold water. Bring to a boil, remove from heat and cover. Let the eggs sit for 12 minutes. Remove from pot and run under cold water. Peel and chop.
Mix all the ingredients in a small bowl and taste for additional seasoning.


Ramp Pesto
Makes about 1 cup
12 ramps, about 2 bunches
3 cups packed baby spinach
1 cup cherry tomatoes
1/2 meyer lemon, zested and juiced
2 tablespoons Red Sparkenhoe cheese, grated, plus more for garnish
1/4 cup blanched almonds, toasted, divided
1/4 cup extra virgin olive oil 
kosher salt
black pepper
Freshly toasted breadcrumbs, optional for garmish
Toss the ramps with a little extra virgin olive oil and season with salt and pepper. Place in a hot grill pan and cook until the white parts wilt and the leaves char slightly. About 3 minutes. Remove from pan and place in the bowl of a food processor. Place spinach directly into the pan and season with a sprinkle of salt. Cook until the leaves wilt slightly and begin to give off their liquid. About 2-3 minutes. Remove and add to the food processor.
Add the lemon, zest, cheese and 2 tablespoons of almonds to the processor. Pulse until chopped slightly. Add the oil and pulse until the pesto comes together but is still chunky.
Toss with your favorite pasta and garnish with tomatoes, cheese, reserved almonds and fresh breadcrumbs.